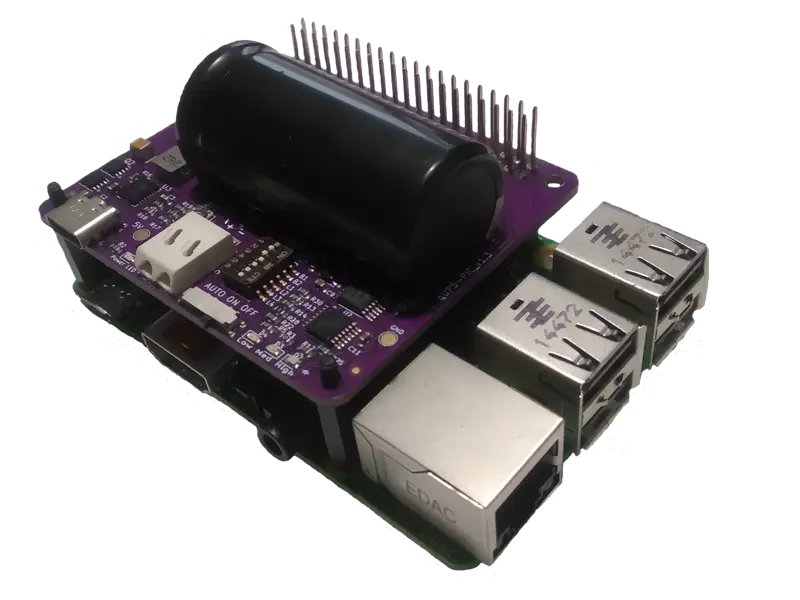
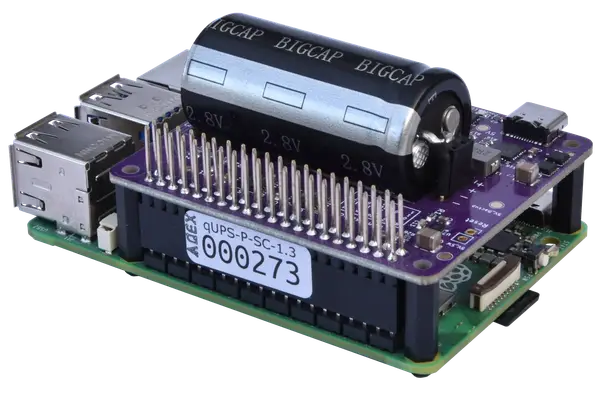
qUPS-P-SC: UPS HAT for Raspberry Pi with Ultra Durable Supercapacitor
Power outages are no longer a threat. The qUPS-P-SC is a professional, battery-free UPS HAT designed for industrial Raspberry Pi UPS applications. Built with high-end supercapacitors, it ensures a safe, graceful shutdown during extended power failures. It provides a long-lasting, maintenance-free Raspberry Pi power backup solution that operates reliably across a wide temperature range.
The Objective Behind qUPS-P-SC
Create a UPS solution for Raspberry Pi or compatible product, which is durable, has low carbon footprint, and can be used in harsch environment.
As the battery is the bottleneck of the tradional UPS solutions for these requirements, we have chosen SuperCapacitor for energy storage. It has extra high charge cycle rate, and wide operational temperature range. It is much greener product.
Design Choices for qUPS-P-SC
Form Factor
For easy assembly, qUPS has HAT form factor. Simply connect it via the 40 pin header.
Expandable Capacity
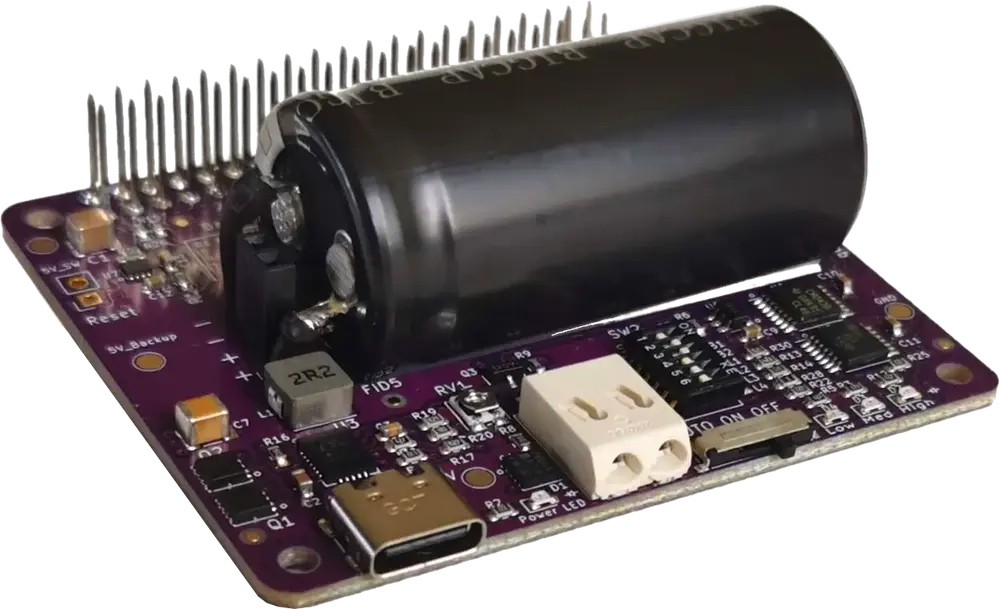
A powerful 100-120F supercapacitor for providing reliable backup power. Capacity is expandable with an external module.
High Efficiency
Highly efficient boost converter for increasing the backup time.
Minimize inline energy loss
Offline topology - very efficient in inline state. Disadvantage: very short (<1ms) voltage degradation at power loss. Raspberry Pi can handle such issue.
Stackability
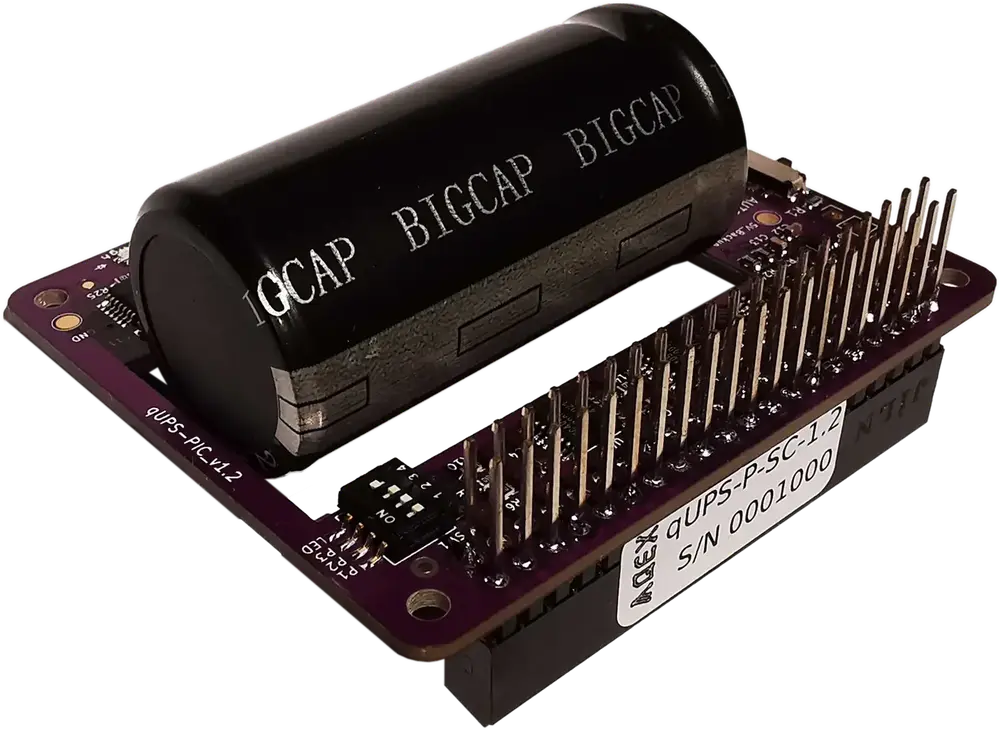
Pins on the connector are long ones, all can be accessed from the top of the product.
Communication Ability
Capable of warning the Raspberry Pi in case of input power loss, and at low energy level of the energy storage for proper shutdown.
GPIO communication
Easy programming. Avoid extra load on capacitance limited I2C bus. Only 3 GPIO ports for communication. 3 options to choose from.
Disable communication
All GPIO ports can be used for other purpose.
Reliable connection
Massive, soldered pin header for power and signal connection. Pogo pins are not reliable.
Zero firmware
Everything is done by hardware.
Shutdown issue handling
If the power is coming back, when the Raspberry Pi is already in shutdown mode, it can stuck in this state. qUPS is able to handle this situation properly.
Safe boot
In AUTO mode the Raspberry Pi will be powered, if there are enough time for booting the OS and make a proper shutdown process. This level is adjustable.
Avoid restart cycle
If the qUPS’s energy level is too low in backup mode, it can’t power the system. Without a load, it restores 5V, causing the system to restart repeatedly. In AUTO mode, the qUPS switches off the power below an adjustable energy threshold.
On mode – the reason
In AUTO mode, the Raspberry Pi doesn’t start immediately, and the supercapacitor’s full capacity isn’t used. ON mode solves these, but safety features are lost.
Pin allocation of the qUPS-P-SC
B1-B2: ON-OFF
Power Good/17
Limit Low/27
Shutdown/22
B1-B2: ON-ON
Power Good/05
Limit Low/06
Shutdown/26
B1-B2: OFF-ON
Power Good/23
Limit Low/24
Shutdown/25
qUPS-P-SC User Interface and Indicators
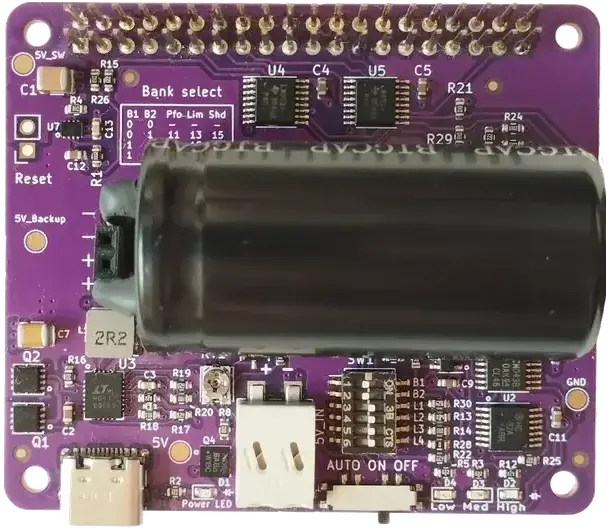
1 - Raspberry Pi 2x20 pin connector
2 - DIP Switch: setup GPIO ports & threshold levels
3 - SuperCap level LED Feedback
4 - Mode switch
5 - Auxiliary power input
6 - Power LED
7 - USB-C connector: Power input
8 - Input threshold tuning potmeter
9 - Capacity extender
10 - Reset connector
Technical Specs of the qUPS-P-SC
Energy storage device
- Type
- Supercapacitor
- Capacitance
- 100-120F
- Capacity extendable

- Charge cycle
- 500 000
- Operation temp. range
- -40..+65˚C
- Backup time on RPi4 (max load)
- 30 sec
Physical parameters
- Form factor
- Raspberry Pi HAT
- Dimensions
- 65x56x23mm + 11mm header
- Weight
- 41g
- Stackable
- Replaceable supercapacitor
Electric parameters
- Charging current
- 2A
- Maximum discharge current
- 7.5A
- Maximum load current
- 2.5A
- Output voltage
- 5V
Power Supply
- Input voltage on main connector
- 5V
- Input voltage on auxiliary connector
- 5V
- USB PD (RPi5) compatibility
Connectors
- Main power input
- USB-C
- Auxillary power input
- Reset
Communication
- Method
- 3 GPIO port
- GPIO port allocation
- 3 options
- Disabling option
Setup
- Mode options
- AUTO-ON-OFF
- Adjustable level threshold
- Adjustable input voltage threshold
Indication
- Input Power
- Supercapacitor voltage level
- 3 LEDs
Safety
- Reverse polarity protection on auxillary input
Control
- External control of the power of Raspberry Pi
Software
- Control software
- C++ & Python
Raspberry Pi Power Requirements
What determines a Raspberry Pi’s power consumption?
A Raspberry Pi's power draw is never a fixed value; it fluctuates dynamically based on active tasks and connected hardware. The primary factors include CPU load (e.g., 4K video decoding or AI processing), peripherals (USB cameras, external drives), and the energy requirements of active cooling solutions like fans.
Why does the Raspberry Pi 5 consume more power than the Pi 4?
The Raspberry Pi 5 introduced a massive leap in performance, which naturally comes with increased power demands. While the Pi 4 could get by with less, the Pi 5 can draw up to 5A under peak load. This is driven by the new PCIe interface (supporting NVMe SSDs), higher CPU clock speeds, and high-speed USB ports. Because of this, stable power delivery and buffering are far more critical when using a Pi 5.
qUPS-P-SC Technology and Physical Constraints
Why does backup time decrease disproportionately under high loads (e.g., Pi 5)?
Under heavy loads, a "double-bind" effect occurs. To maintain a stable 5.2V output, the qUPS must draw increasingly more current from the capacitor as its voltage drops. This process has its limits: due to the rising current demand, the system's critical voltage threshold "deteriorates," meaning the shutdown occurs at a higher voltage level. Consequently, under high loads, a significant portion of the energy stored in the capacitor remains inaccessible, drastically shortening the backup time. This physical constraint can be countered using the qUPS Extender module, which slows down the voltage drop by multiplying the total capacity.
What is the critical voltage level and the hardware current limit?
The critical voltage level is the threshold down to which the internal DC-DC converter can still extract energy from the capacitor. This boundary is defined by the module's hardware current limit of maximum 7.5A (typically 6.5A). As the Raspberry Pi’s power consumption increases, this limit "consumes" the available headroom much sooner:
Low load (e.g., Pi 2): The converter requires very little current, allowing the critical level to improve down to 1.2V – meaning the capacitor can be almost completely discharged. Consequently, the Pi 2 achieves a backup time of 168 seconds under no load, and 80 seconds under maximum load.
High load (e.g., Pi 5): The system hits the 7.5A limit much earlier, at a critical voltage of 2.0V – 2.2V. Because this "worsening" threshold makes the lower voltage ranges of the capacitor inaccessible, the backup time drops to 8 seconds under the Pi 5's maximum load, however it is still 74 seconds, if there is no load on Pi5.
qUPS-P-SC Manuals & Resources
qUPS-P-SC Gallery
qUPS-P-SC 3D view & Model
Purchase Options for qUPS-P-SC

Frequently Asked Questions (FAQ) – qUPS-P-SC
Q: Is a special driver required?
A: The module functions without a driver, but for a graceful shutdown, we recommend using the driver available for download on our Github repository.
Q: How does the UPS module connect to the Raspberry Pi?
A: The module mounts directly onto the Raspberry Pi via the standard 40-pin GPIO header (HAT format). No soldering or extra wiring is required.
Q: Is external mounting hardware necessary?
A: Yes. To ensure a stable mechanical and electrical connection, we recommend using the included M2.5 spacers through the four mounting holes of the HAT.
Q: Does the Raspberry Pi need its own power cable?
A: No, and it is strictly forbidden! Power must be supplied exclusively to the UPS module’s input. Providing power through the Raspberry Pi’s own USB-C port simultaneously can cause permanent damage to both devices due to the conflict between the two power sources.
Q: Is the module compatible with the Raspberry Pi 5?
A: Yes, it is both mechanically and electrically compatible. The qUPS module fits the Pi 5 GPIO pins; however, its effective backup time depends on the specific power draw of the Pi 5.
Q: Does the qUPS-P-SC include an I2C identification EEPROM?
A: No, the qUPS-P-SC does not contain an EEPROM. However, the Raspberry Pi requires no prior configuration. You only need to run the Control SW (Software) with the appropriate parameters. While the module follows the HAT physical form factor, the lack of an ID chip means it is not strictly "HAT-compliant" according to the official specifications.